
Double DIY
Hand Warmers & Heating Pack
Hello everyone! Today I have two lovely little DIYs for you!
 I don't know where you all live, but where I live it is cold.
I walk my dog everyday, and it tends to be coldest whenever I go! We're talking -20 degrees here guys.
Brr...
So you could probably imagine how cold my hands can get haha. Gloves just don't always do the trick! So I made myself some nice little hand warmers. After I did that I decided I could also make myself a bigger version- heating pack! It's lovely for when it's a bit chilly in your house. Or you're not feeling well, or you have a sore neck, etc. Anything you like really!
Before I get started though, I just wanted to say thank you to everyone for the views/comments on my last post. Those made me SO excited, it all means so much to me!
Now on with the DIYs!!
First up:
Hand warmers-
 These little guys are super easy but also super helpful!
And you can just use any fabric/scrap fabric you might have lying around.
Here's what you need:
Fabric, rice (or beans!), a needle and thread OR a sewing machine.
 Step one: Cut TWO pieces of 8in x 4in fabric.
I just used this leftover from a skirt my sister made!

Step Two: Place the two pieces with both right sides (more colorful sides) facing upward, almost so they are already one piece of fabric. Then fold them in half(so the dull sides are on top), sewing along like shown above.

Step Three: When you sew, make sure to do a few back stitches on both sides and leave that small gap!

Step Four: Fill it up! I used about 1/3 cup of rice I think. But you just use what you can fit! If you need to you can use a funnel to pour it in, but I just asked someone to hold it open for me.
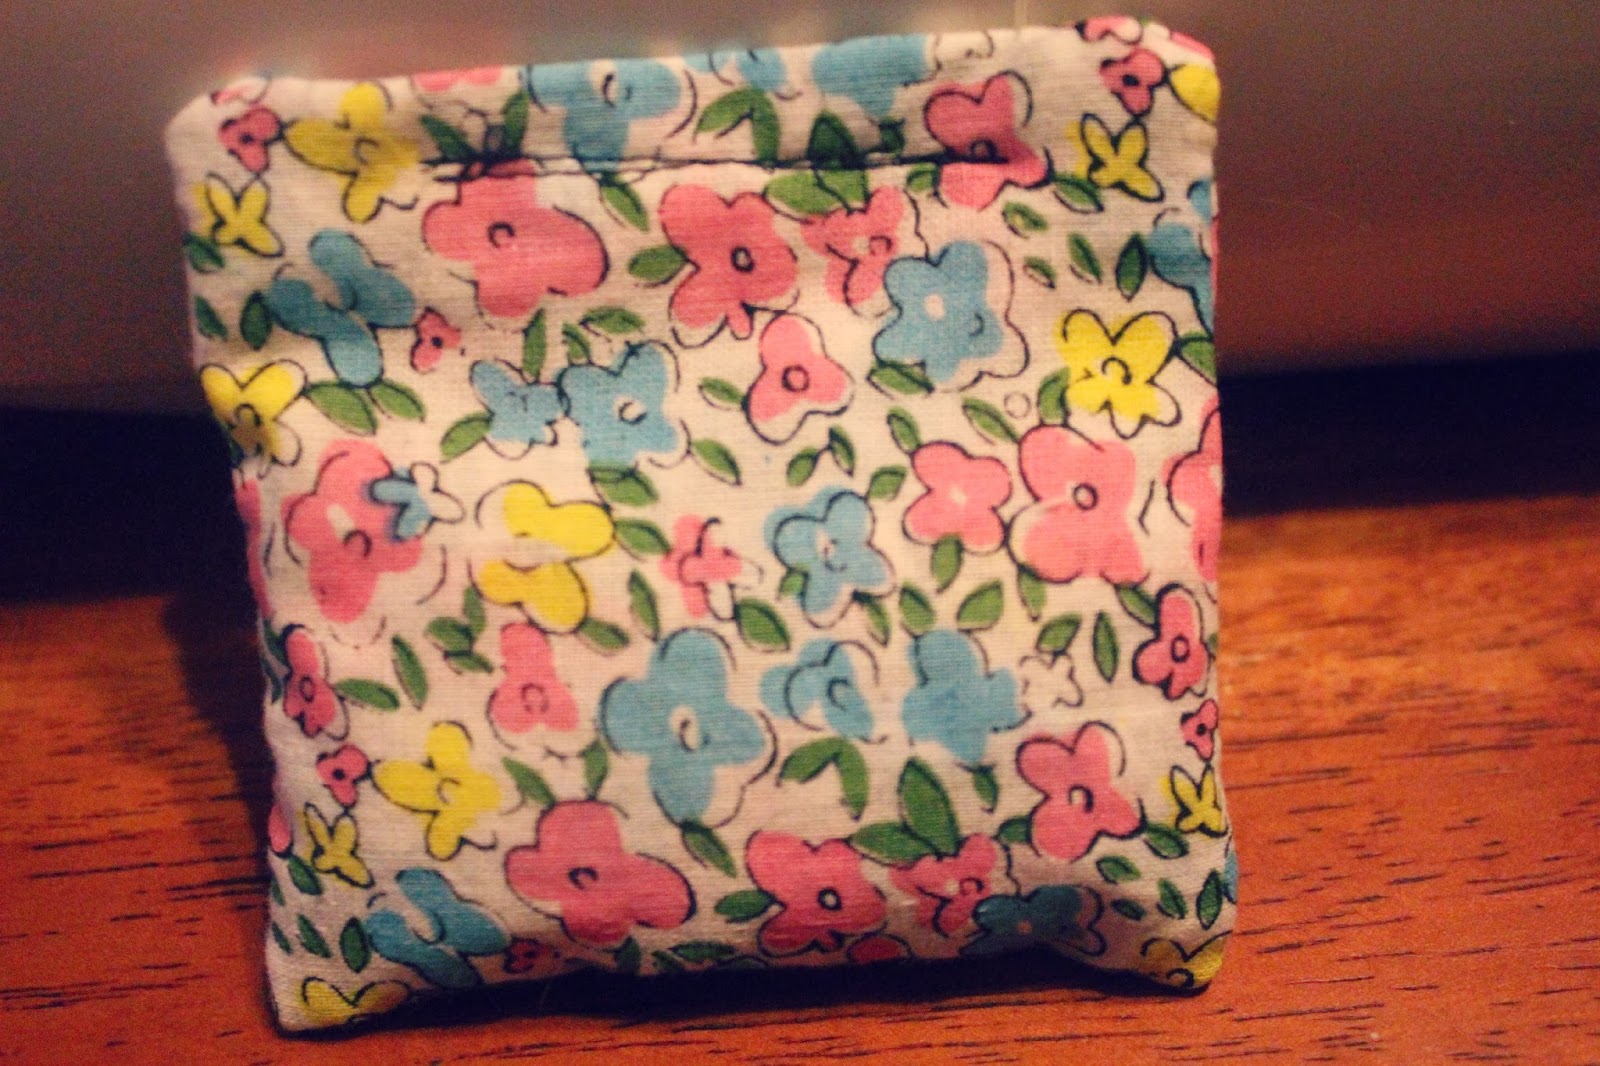
Step Five: Sew it up! Again, remember to back stitch. I purposely used black string so you all could see what I sewed! And it's simple as that. You're all done. Make a pair and throw them in the microwave for 25-30 seconds and there you go!
And now, the heating pack!
My, this post is going to be long hehe.

This pretty much the same premise as the hand warmers- just bigger!
What's cool about this, is you can just use an old pair of jeans you have lying around.
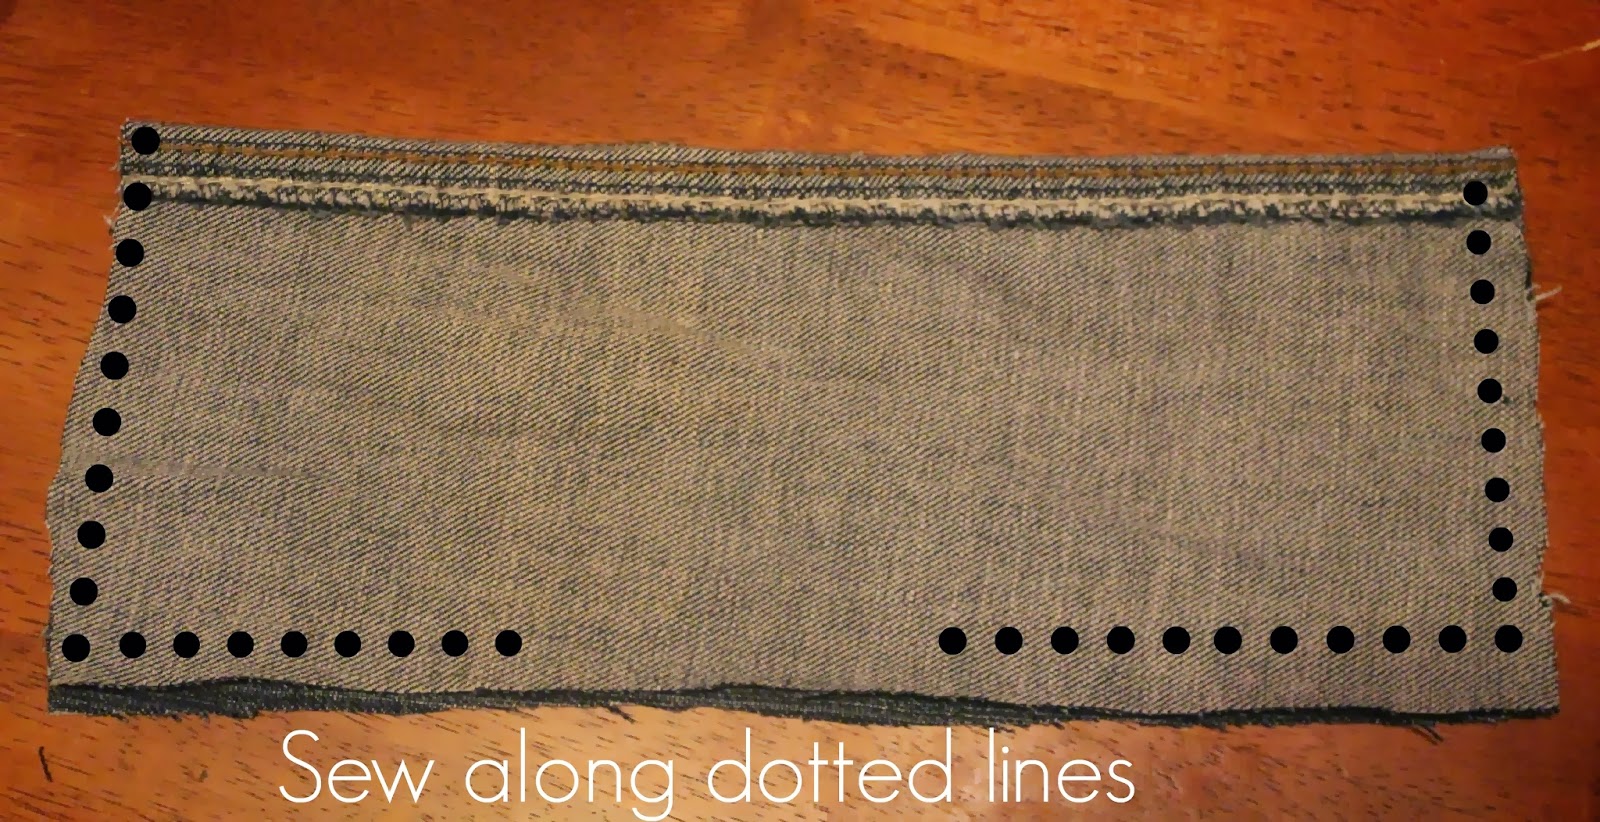
 Step One: So first you need to lay your jeans out on a flat surface and smooth them out.
 Step Two: Cut it on the seam so when it's unfolded it's about 8.5 x 11in. This is just the size I wanted mine- it can really be what ever size you like though!
Step Three: fold and sew it with right sides (front/more colorful) together. Make sure you leave the gap and back stitch, then flip it inside out and fill it up with rice!
Mine actually took almost the whole bag of rice(I used left over from the hand warmers), but my mom got the rice on discount and (it's not very expensive anyway really) for my projects, so she didn't mind my using it all up!
 Step Four: This is probably the hardest part. You need to sew up the gap without spilling the beans- er I mean rice;). I removed the front piece of the sewing machine to make more room.
I had to sew over mine about three times before I closed up the gap all the way. Again-make sure you back stitch!
Then you're done! Easy peasy :)
Throw it in the microwave for 1-2 minutes depending on how hot you'd like it to be!

Sooo, I hope this can be helpful to those of you who aren't on the other side of the world in burning up Summers right now!
I'm hoping to start posting more regularly, as I've got quite a few ideas up in my head, and a few already done!
Plus I've been given a bit of a decorating job. More on that later though heheh.
Hope you're all well!
Stay minty,
-Juli
Step Three: When you sew, make sure to do a few back stitches on both sides and leave that small gap!
Step Four: Fill it up! I used about 1/3 cup of rice I think. But you just use what you can fit! If you need to you can use a funnel to pour it in, but I just asked someone to hold it open for me.
Step Five: Sew it up! Again, remember to back stitch. I purposely used black string so you all could see what I sewed! And it's simple as that. You're all done. Make a pair and throw them in the microwave for 25-30 seconds and there you go!
And now, the heating pack!
My, this post is going to be long hehe.


