Monday, October 27, 2014

Drugstore Halloween How to: Tiger makeup

Drugstore Halloween How to:
Tiger Makeup

Hey guys! Today I have a makeup tutorial brought to you by my little sister Kori!
She's starting her own blog soon, so I thought I'd let her get in some practice over here.
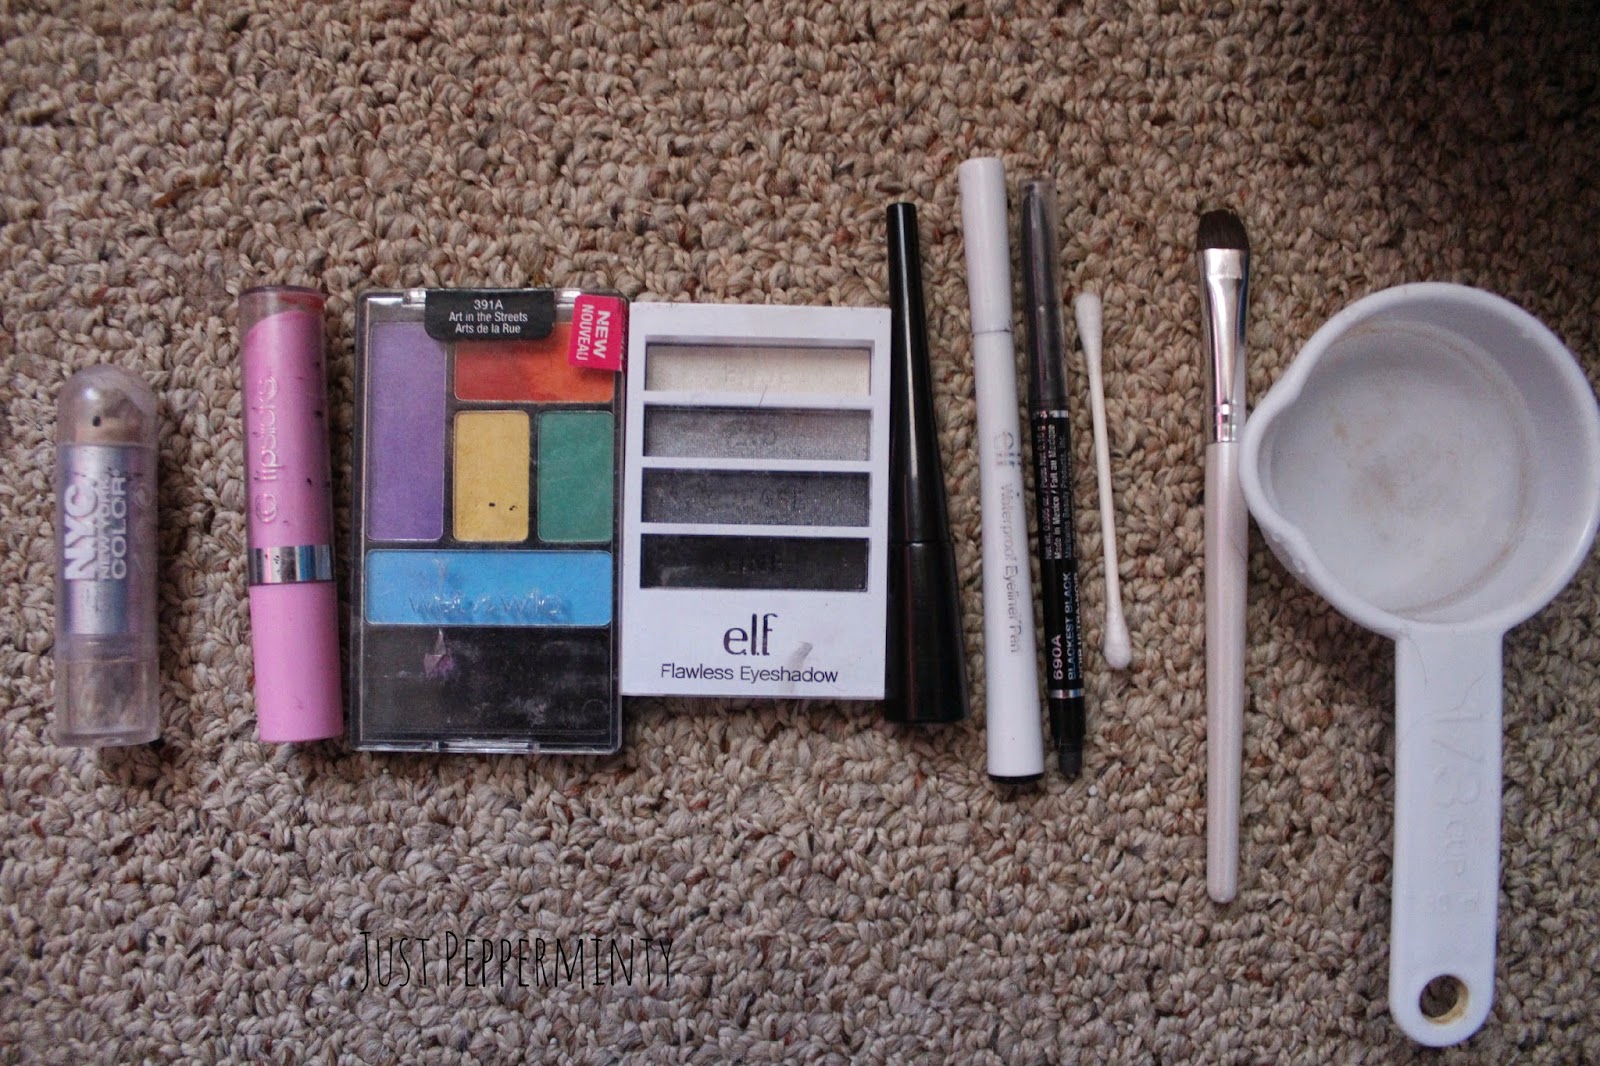


What I used:
e.l.f. Professional eye shadow brush 
Q tips
Water
Wet 'n' Wild megalast black eyeliner
e.l.f. Waterproof eye liner pen
e.l.f. liquid liner
Wet 'n' Wild rainbow eye shadow
e.l.f. black eye shadow
Thick concealer a few shades lighter than your natural skin tone
light lip gloss


 I started with an almost fresh face. Just covering up some pesky blemishes with my normal cover up.


With the wet n wild eyeliner I made some rough outlines of my tiger stripes.

Then I outlined them more precisely with the liquid liner, dipped my eye liner brush into my cup of water and made a bit of a paste with the black eye shadow, and filled in the stripes.

I made the same paste type thing with the orange Wet 'n' Wild shadow (Though the wet n wild shadow didn't need near as much water as e.l.f.), then spread it in between the stripes and across my forehead.


Ya know when you put on your eyeliner, it looks PERF and then you blink and it smudges? I did that- but on purpose to make the line thicker, then smoothed it out a bit. I used my eyeliner pen for this, but the liquid liner would work just the same.


I extended the line around my entire eye and then tried to draw a triangle, and filled it in.
 I have no advice for this. It took me a lot of Q tips and water a.k.a. I messed up about three times.


With the liquid liner again, I made a bit of a heart shape on the bottom half of my nose, and drew a line down to my lip. put a couple flecks of it to fill in the spaces and with a wet Q tip rubbed it in.


With some of the black eye shadow paste fill in your upper lip.


Cover the rest of your nose and jaw with the lighter concealer and put the lighter gloss on your bottom lip.

And you're done! Wasn't that easy?


Stay minty! Or whatever it is that Juli always says...

Stay minty,
- Juli
 (and Kori)

Friday, October 24, 2014

How To: Mask a Photo into a Shape or Text

How To: Mask a Photo into a Shape or Text
This is a super quick + easy tutorial that you can use for wall art, instagram photos, or a profile picture- maybe a shaped sidebar photo for your blog!
For this tutorial I used Photoshop, but you could use a free alternative (like gimp) if you don't have Photoshop.
So, here's how you do it:

1: Open a new file in your editing program with a transparent background. I made mine 800x800 but you can choose your size accordingly.

2: If you're using text, click on the type tool and type whatever you like. I chose a bold font that I'm sort of obsessing over at the moment!
(If you're using a shape use, one with a transparent background)

3: Drag in your photo. Place it to cover your text and hit enter. I'm using a watercolor I did of a galaxy (I'm obsessed okay!)

4: In the layers tab right click your photo's layer, and choose 'create clipping mask'. You should see that small arrow will appear on the left side.

5:Click the new layer button (the page icon at the bottom) and add a blank white layer. Drag it below your text layer. You can make the background whatever color you want, but I liked the way it flowed with my image as white.

Now you're done! 

I hope you guys liked this tutorial!

If you have any questions feel free to ask- I'll be happy to answer!


P.S. I'm working on a new blog design for my own blog AND for the blog my younger sister is starting! Hopefully you guys will be able to see them both pretty soon!


Stay Minty,
-Juli

Tuesday, October 14, 2014

Starlight


Don't you see the starlight?
Don't you dream impossible things?
{click}


-


I'll be honest, I don't really care for this photo, but Taylor is my girl and I felt like it kinda fit hehe.

Stay Minty,
-Juli

Sunday, October 12, 2014

DIY Donut Stationary

DIY Donut stationary

So, is it just me or are donut (doughnut??) graphics/watercolors/stationary/crafty things reaaaally, cute?
Well, I happen to think they are, so I put a donutty craft on my to-do list, and came up with these little guys!


I'll be honest with you, this is not how I was picturing these guys in my head! I wasn't so sure about posting them, but my family was telling me they were pretty cute, so here they are! 


• Large circular object (I used a roll of tape)
• Small circular object
• Construction paper in the colors of your choice
• Scissors or exact-o knife
• Pencil
• Tape and or glue
• Things to decorate- I used confetti that I punched, glitter pen and markers.
You can also use glitter/glitter glue and whatever else you can think of!

What you do:

• Trace around your large circle with pencil, and then use your small object to trace a middle hole
•Cut out around the large circle and then fold it in half
• Cut out the middle circle. Folding it in half just makes it easier- but feel free to do it however you please!


• Cut out another circle for either your donut shape or icing
• Cut a squiggly shape out of preferred icing color and tape or glue onto main donut shape
•Then decorate them to your hearts content.

Once you're done you can use them as stationery or you could even punch a small hole into the top and use them for bunting! Or put it into an envelope like I did and you could ship it off somewhere!
I love these cute little triangle envelopes, if you guys like them I could make a tutorial.
I haven't tried it myself yet, but I've heard you can ship them out in that shape!

I hope you guys like this simple little DIY :) If you make some, email me a picture or tag me on instagram! @Justpepperminty
I'm thinking about making some other foody shaped stationery too! I'll keep you guys updated.

Stay Minty,
Juli