Showing posts with label craft. Show all posts

Saturday, March 14, 2015

DIY Pillow Cover - with Sophie

Hey everyone, my name is Sophie, and I run the sewing and interior design blog, iDesigns by Sophie! I love Just Pepperminty and I'm so excited to be doing a guest post here! The first thing I sewed by myself was a pillow cover, so that's what I'll be sharing with you today.


Here's what you'll need:
  • Pillow insert (for this tutorial, I used a 12 x 16 inch insert)                            
  • 1/4-1/2 yard of fabric, depending on your pillow size
  • Thread 
  • Sewing scissors
  • Rotary cutter (optional)
  • Thread snips (optional)
  • Pins
  • Needle
(note from Juli) If you guys are looking for a place to buy a pillow insert then you should check out PillowCubes! They're currently offering a discount for Just Pepperminty readers, so go find something you like and check out with the code: 10JustPepperminty and you'll receive 10% off your order!

Step 1: Wash and iron the fabric. It's important to wash the fabric because it softens it a little but, and also rinses off whatever weird coating or chemicals that could be on it from the manufacturer. I would recommend running a quick zig-zag stitch around the edges before doing this so that the fabric doesn't fray.


Step 2: Cut the fabric to size, taking a 5/8 seam allowance into consideration on every side. So, since I was using a 12 inch x 16 inch pillow insert, I cut the fabric into two 13.25 inch x 17.25 inch pieces.


Step 3: Lay the fabric pieces on top of each other with the right sides touching each other in the middle. Then pin 3 of the 4 sides. I don't usually use too many pins; just use as many as you need!


Step 4: You've probably thinking, what about the 4th side? Since we have to insert the pillow into the cover, we can't sew all the way around. First, find the center (for this size, it was at 8.625 inches) and mark it with a pin or light pencil mark. Then, measure 5 or 6 inches out on either side of that mark, and mark those with two pins right next to each other. This is to remind you when to stop sewing!


Step 5: Sew around the cover using your sewing machine! Make sure not to use a basting stitch, it won't hold together well. When you're finished, use the thread snips to cut off the excess thread. If you don't have thread snips, scissors will work too!


Step 6: Snip the corners so that they will be sharper when you turn the cover it right side out. Then, go ahead and turn it right side out! Next, carefully insert the pillow form into the cover.


Step 7: The last step is to hand-stitch the open end using thread that matches your fabric. For this fabric, I chose white, so it wouldn't stand out. Tie it off and use the thread snips or scissors to cut off the excess thread. 


And that's it! I did this project for the first time without any sewing experience, so you can too!


Connect with me on social media: Facebook // Pinterest // Website // Blog // Etsy 


Huge thanks to Sophie for a wonderful post! Stay tuned and you'll see me popping over on her blog!

Stay Minty,
-Juli
Wednesday, December 17, 2014

11 Last Minute DIY Gifts

11 Last minute DIY gifts

Hey hey hey everyone!
Today, -seeing as I'm a horrible procrastinator myself- I thought I'd bring you guys a nice list of last minute gifts for the holidays! DIY's even. The holidays always seem to sneak in super quick to me- like I'm pretty sure Halloween was last week.
So anyway, I was scrolling through blogs and pins upon pins, and here's what I came up with:


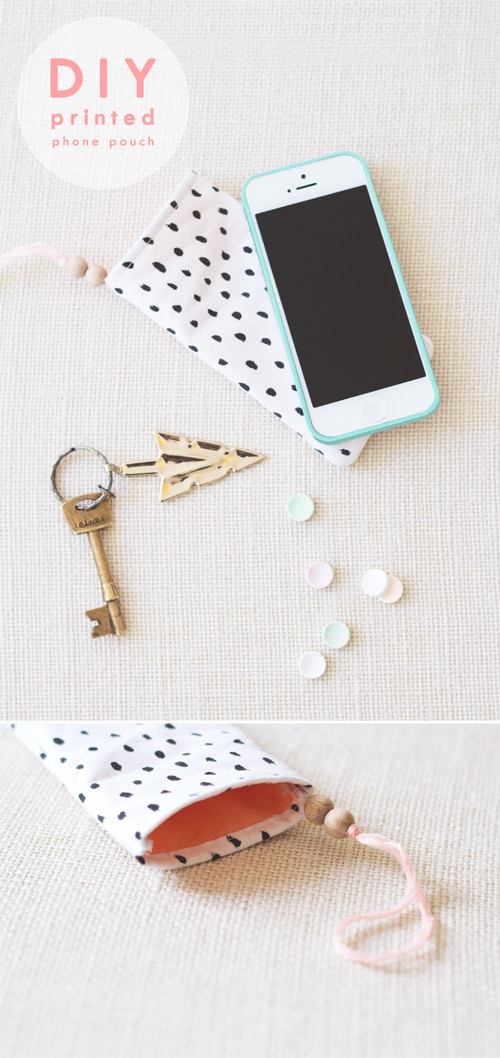
DIY printed phone pouch
You could customize this for most anyone you know!

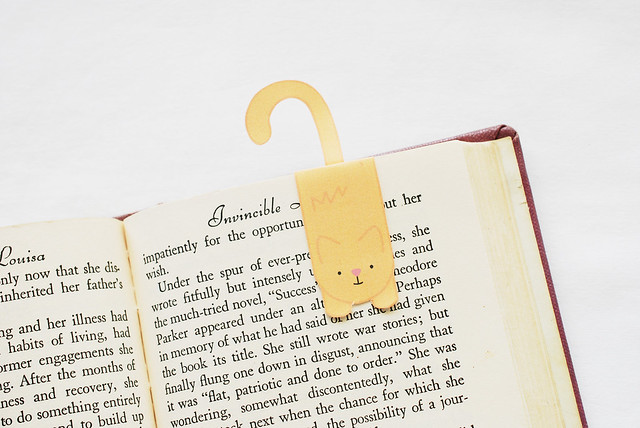
Kitty Magnetic Bookmark

For the reader in your life. These are so simple- and it's a printable!
via Wild Olive

A Simple Clutch

I love these because you can use fabric you have lying around at home, or choose the perfect one for your receiver!
via I Heart Naptime & girl. Inspired

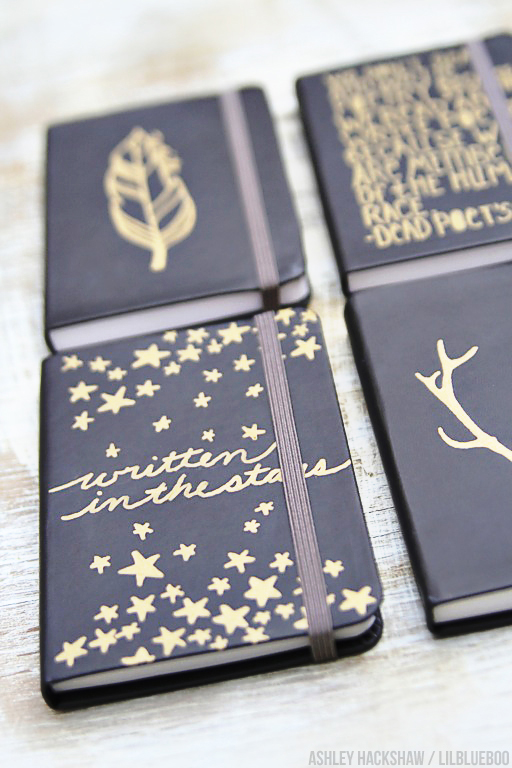
Simple Sharpie Journals (+ matching gift wrap!)

Guys. I am literally obsessed with these.
All of them. lovelovelove them.
If you have a writer or artist in your life these would be a fantastic gift!
via lil blue boo

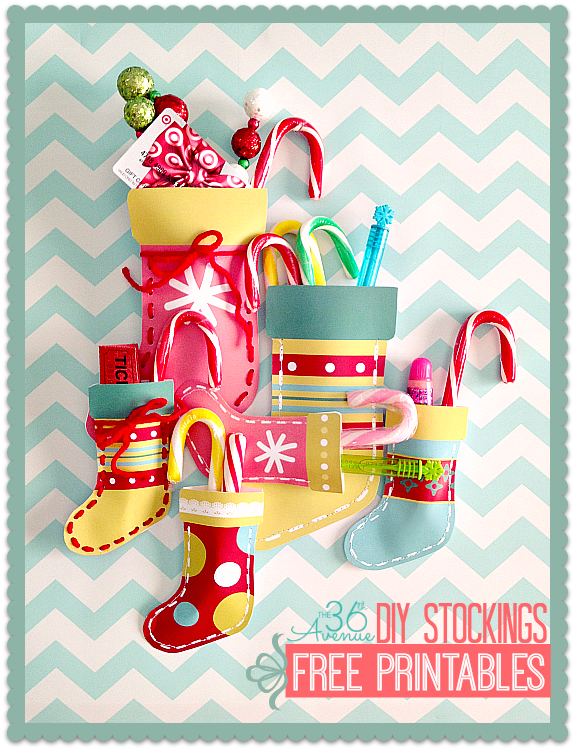
DIY Christmas stockings


These stockings are seriously adorable, they remind me of something my grandma used to
give my sisters and me each year. You could even do them like Russian nesting dolls and put a small one inside a larger one. More stocking stuffers for everyone!
via The 36th Avenue

DIY Mini Banner

You could make these with the persons favorite quote to give a really personal and thoughtful gift!
via a little birdy blog

DIY Hot Cocoa Ornaments
These ornaments are so great. I'm definitely making these for some of my friends.
(Hopefully they're not reading this right now)
via Bubbly Nature Creations

DIY Map Necklace
This is great for the traveler(or wanna be traveler)!
via the sum of its parts

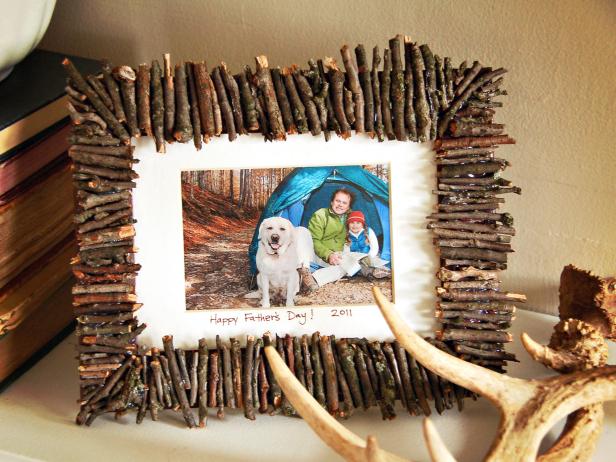
DIY Rustic Frame
I came across this and instantly planned on making one for my parents.
I know it says fathers day, but I know either of my parents would love it!
via HGTV 

DIY Finger Knit Scarf

How about a nice scarf for the cold months?
via Just Pepperminty

DIY Chalkboard Mug

I don't know about you guys, but I'm kinda obsessed with how cute this is.
via Wit & Whistle

Alrighty, that's what I've got! Hopefully it's a little helpful to some of my fellow procrastinators.
Enjoy your holidays!

Stay Minty,
- Juli

Wednesday, November 19, 2014

DIY Fandom Totebag

DIY Fandom Totebag


Hey guys, Long time no see! (I say that way too much)
So I haven't posted this here yet, and I thought you guys might like to see it! 
Me and my sister made it for a friend quite awhile ago and I took pictures, wooooo.
Also if you haven't seen/noticed yet, I redid my design awhile ago, simpler is kinda my thing right now haha.
Anyway, on with the tutorial


What you need:
Tote bag // paint brushes // fine tip sharpie // cardboard // acrylic or fabric paint


Step one: 
Start off with a plain tote bag and wipe it clean with a dry towel or rag. I got mine from Walmart in the arts and crafts section for about $3


Step Two:

I did a sketch of the Hogwarts castle (Harry potter is liiifee) on mine and inserted a cardboard box so paint wouldn't soak through. You can freehand something, or do a quick google search to find an outline of what you want. (If you do that, just print it, cut it out with scissors or a craft knife and trace around your outline with with a pencil.)


Step three:
With a small paint brush do a quick outline of your sketch- it doesn't have to be perfect, you can touch it up later!


Step four:
With a larger brush paint in your outline. Near the bottom I added a bit of water to my paint to give it a bit of a washed/grey feel. 
You can now go around your edges to fine tune any mistakes you might've made, if you haven't made any you can move on!


Step five:
I decided to add a favorite quote of my friends- "It does not do to dwell on dreams and forget to live" 
Again, you can go online and find an outline of a banner and cut and trace it onto your bag. Once you fill it in, let the paint dry before writing on it with a pencil. Using a small brush (or fine tip sharpie) you can add your quote


Aaand that's it! 


Just let it dry, then flaunt it around! It's great for carrying books, an extra jacket, your laptop, wallet, anything that fits!
-
I've got a couple post ideas actually, so that's good news;) 

Oh and are any of you guys doing NaNoWriMo this year? Curious if there's any fellow writers around here :)

Stay Minty,
-Juli

Sunday, October 12, 2014

DIY Donut Stationary

DIY Donut stationary

So, is it just me or are donut (doughnut??) graphics/watercolors/stationary/crafty things reaaaally, cute?
Well, I happen to think they are, so I put a donutty craft on my to-do list, and came up with these little guys!


I'll be honest with you, this is not how I was picturing these guys in my head! I wasn't so sure about posting them, but my family was telling me they were pretty cute, so here they are! 


• Large circular object (I used a roll of tape)
• Small circular object
• Construction paper in the colors of your choice
• Scissors or exact-o knife
• Pencil
• Tape and or glue
• Things to decorate- I used confetti that I punched, glitter pen and markers.
You can also use glitter/glitter glue and whatever else you can think of!

What you do:

• Trace around your large circle with pencil, and then use your small object to trace a middle hole
•Cut out around the large circle and then fold it in half
• Cut out the middle circle. Folding it in half just makes it easier- but feel free to do it however you please!


• Cut out another circle for either your donut shape or icing
• Cut a squiggly shape out of preferred icing color and tape or glue onto main donut shape
•Then decorate them to your hearts content.

Once you're done you can use them as stationery or you could even punch a small hole into the top and use them for bunting! Or put it into an envelope like I did and you could ship it off somewhere!
I love these cute little triangle envelopes, if you guys like them I could make a tutorial.
I haven't tried it myself yet, but I've heard you can ship them out in that shape!

I hope you guys like this simple little DIY :) If you make some, email me a picture or tag me on instagram! @Justpepperminty
I'm thinking about making some other foody shaped stationery too! I'll keep you guys updated.

Stay Minty,
Juli

Tuesday, April 15, 2014

DIY- Flower Crown

DIY
Flower Crown

Hello everyone! Today I have a lovely project that my sister and I made for the Demi Lovato concert we went to (still miss that day asdgkn). And also, just because she wanted a flower crown to wear whenever she wanted hehe.
Aaanyway, it looks like this:

It's pretty simple and doesn't take too long to make either! 

What you need:

Fabric or felt of choice (we used an old lace t-shirt!) // hot glue gun // scissors // wire hanger or garden wire // ribbon (optional) // tea or food coloring to color (optional)


To start:

Take your wire, and measure it to fit on top of your head, then cut and twist the ends together.

If you're using a wire hanger just untwist it then wrap it around into a circle like so, until it is the right size for you! 


Next take your fabric and cut it into about 3in. circles.
Bigger if you like!

If you want to color your fabric pieces you should do that now. For the pink ones we used water and red food coloring, and with the beige ones we used a cup of tea!
Just let them soak up some color and leave them to dry while you move on to the next step!

While they're drying you can wrap your wire in a ribbon or bakers twine- you could do anything you want actually! We wrapped this one a couple times around. When you get to the end, finish it off with a dab of glue.
Tip: if you are wrapping your band in something, I recommend putting a drop of hot glue every so often to keep it from unraveling til you get to the end.

Next, take your dried circles and follow along with the photos below!
What you're doing is putting a dab of glue in the center and pinching it into a little bunch.

Once you have four of those you put a drop of hot glue onto the bottom of one circle and press it with the bottom of a second circle. Then the third, then fourth!
 //2nd pic putting glue on, 3rd pinching together, 4th adding all four together//

When you have enough flowers you can start assembling them onto your band!

And now you're done!
Oh and if you're interested in the nice lipstick she's wearing, that's a DIY too!
I did a guest post about it over at The Blog Hermit! Click here to see how to make it.
It's really quick, pretty and you probably have everything for it at home. :)

And here's a full view of the sweatshirt my lovely model and little sister Kori made in honor of our love for Doctor Who- we are MAJOR fangirls- and she says would be more than happy to make a tutorial on how to make one yourself if you guys would like it!

Okay that's all for now! I hope you guys like it!
If you make one I'd love to see a picture :) You can email me (flickeroflight4@gmail.com) or @justpepperminty on instagram!

Stay Minty,-Juli

Saturday, February 15, 2014

Super Simple DIY: Fabric covered storage

Storage from a Tin
Hey guys! So today-as you can see from the title- I have a very simple DIY for you!
They may be simple but they're SO helpful :)
I saw something slightly similar on Pinterest, but it wasn't fabric covered, just labeled, so I thought I'd try my own twist on them! Plus the idea had been brewing in my head for quite sometime hehe.


A couple of things I use mine for, is holding sewing supplies, -like buttons and thread- And my headphones-I don't know about you guys, but I alwaaays lost my headphones. This is a great place to keep them so you always know where to find them! As long as you remember to put them in ;) 

But really, they're super simple, cute, AND helpful!

What you need:
Scraps of fabric
Altoid tins (or any tin you have/would like to use)
Mod podge (I'm not sure, but other glues/sealers may work!)
Scissors

Steps:
1.
Cut your fabric to cover the area of your tin- I cut mine a bit extra so that I could wrap the sides.
2.Apply a layer of mod podge on the top of the tin with a paint brush and carefully place down your fabric. Make sure you've placed it correctly and smoothed out any air bubbles!
3.Mod podge the sides and press them smooth as well. Repeat this on the inside corners if you still have excess fabric.
4.Once those things dry, you can put another coat of mod podge on the outside to make the fabric less likely to come up after time. 
 
Now you're done! So easy.

If yours are a bit like mine the tins got a little sticky opening up. This is because the fabric made the top thicker(if you folded under). I solved that problem by pressing an indent into the front and middle with my thumb- as you can see if you look closely in the photos-, and they're good as new now. 


   A little tip:
 Do you ever have to spend a lot of time going through your loads of buttons trying to find the right color or  size? You can keep them better organized by stacking them up on a large safety pin like you see below! 


I made these really quickly and it was pretty fun too! There are so many different uses for them, especially because you can do this with pretty much any tin/container that you have!
Of course, I have loads of these Altoid tins because I go through mints like water. They're so amazingly strong and pepperminty!! ;)

Are any of you guys gonna make these? What would you store in them?
Well, I hope you found this helpful:)
Talk to you next time!

P.S. I also have a trick for tangle-free headphone cords! If anyone's interested I'd be happy to do a post on how to make them! :)P.P.S I'm going to try and post more regularly, I just can't seem to get the hang of a schedule haha.

Stay minty,
-Juli

Tuesday, January 21, 2014

Double DIY- Hand Warmers & Heating Pack

Double DIY
Hand Warmers & Heating Pack

Hello everyone! Today I have two lovely little DIYs for you! 

I don't know where you all live, but where I live it is cold. 

I walk my dog everyday, and it tends to be coldest whenever I go! We're talking -20 degrees here guys. 

Brr...

So you could probably imagine how cold my hands can get haha. Gloves just don't always do the trick! So I made myself some nice little hand warmers. After I did that I decided I could also make myself a bigger version- heating pack! It's lovely for when it's a bit chilly in your house. Or you're not feeling well, or you have a sore neck, etc. Anything you like really!


Before I get started though, I just wanted to say
thank you to everyone for the views/comments on my last post. Those made me SO excited, it all means so much to me! 
Now on with the DIYs!! 
First up: 
Hand warmers-
These little guys are super easy but also super helpful! 
And you can just use any fabric/scrap fabric you might have lying around.
Here's what you need:
Fabric, rice (or beans!), a needle and thread OR a sewing machine.
Step one: Cut TWO pieces of 8in x 4in fabric.
I just used this leftover from a skirt my sister made!


Step Two: Place the two pieces with both right sides (more colorful sides) facing upward, almost so they are already one piece of fabric. Then fold them in half(so the dull sides are on top), sewing along like shown above.

Step Three: When you sew, make sure to do a few back stitches on both sides and leave that small gap!

Step Four: Fill it up! I used about 1/3 cup of rice I think. But you just use what you can fit! If you need to you can use a funnel to pour it in, but I just asked someone to hold it open for me.


Step Five: Sew it up! Again, remember to back stitch. I purposely used black string so you all could see what I sewed! And it's simple as that. You're all done. Make a pair and throw them in the microwave for 25-30 seconds and there you go!


And now, the heating pack!
My, this post is going to be long hehe.

This pretty much the same premise as the hand warmers- just bigger! 
What's cool about this, is you can just use an old pair of jeans you have lying around. 

Step One: So first you need to lay your jeans out on a flat surface and smooth them out.

Step Two: Cut it on the seam so when it's unfolded it's about 8.5 x 11in. This is just the size I wanted mine- it can really be what ever size you like though!  


Step Three: fold and sew it with right sides (front/more colorful) together. Make sure you leave the gap and back stitch, then flip it inside out and fill it up with rice! 
Mine actually took almost the whole bag of rice(I used left over from the hand warmers), but my mom got the rice on discount and (it's not very expensive anyway really) for my projects, so she didn't mind my using it all up!
Step Four: This is probably the hardest part. You need to sew up the gap without spilling the beans- er I mean rice;). I removed the front piece of the sewing machine to make more room.
I had to sew over mine about three times before I closed up the gap all the way. Again-make sure you back stitch!
Then you're done! Easy peasy :)
Throw it in the microwave for 1-2 minutes depending on how hot you'd like it to be!


Sooo, I hope this can be helpful to those of you who aren't on the other side of the world in burning up Summers right now! 
I'm hoping to start posting more regularly, as I've got quite a few ideas up in my head, and a few already done! 
Plus I've been given a bit of a decorating job. More on that later though heheh. 
Hope you're all well!

Stay minty,
-
Juli